Connectix 11 Options Older Edition
Connectix 11 User Guide
-
Connectix 11 Options
You’ll find the options under the Options tab by selecting Connectix in the software list.
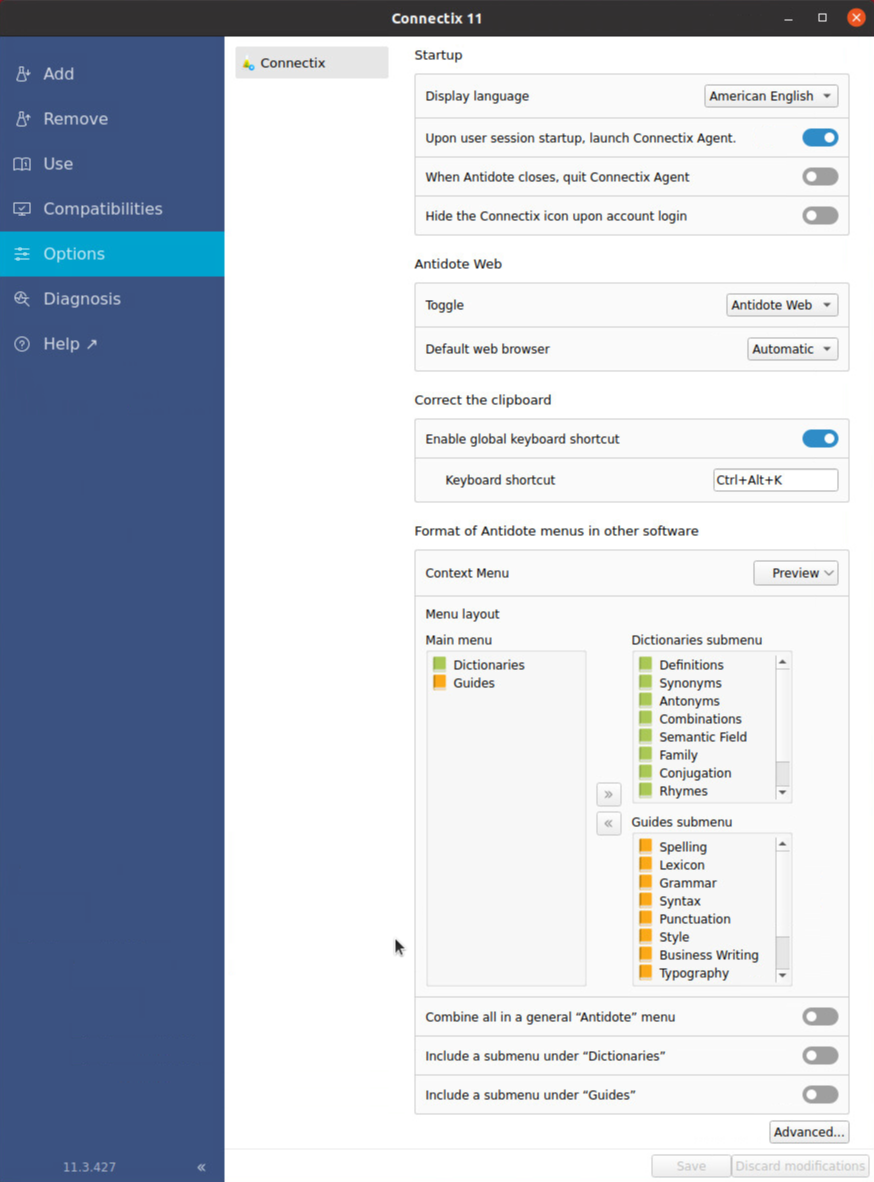
Startup
Display language
Choose the Connectix Agent’s display language. You will need to relaunch the utility for the new settings to take effect.
- The interface language corresponds with the system language by default.
Upon user session startup, launch Connectix Agent
It is recommended that you leave this option enabled to keep the Connectix Agent running, since it manages integration with other applications.
When Antidote closes, quit Connectix Agent
Likewise, it is recommended that you leave this option disabled to keep the Connectix Agent running.
Hide the Connectix icon upon account login
Enable this option to remove the Connectix Agent flask from the notification area.
Antidote Web
Toggle
Indicate which application you want to use when launching Antidote, if you have access to both. Antidote 10 opens locally on your computer while Antidote Web opens in your browser.
Note — Linux compatibility is ensured through Antidote Web (available with Antidote+ packages) since Antidote 11’s release. The option for using Antidote locally won’t be offered, unless you still have a previous edition license, like Antidote 10.
Default web browser
Indicate which browser you would like to use every time you open Antidote Web. Browsers that are integrated with Antidote appear in the drop-down menu. Choose Automatic to use your default browser.
Correct the clipboard
Enable global keyboard shortcut
Turning on this option enables the shortcut that launches the corrector from any application with the text contained in the clipboard.
Keyboard shortcut
The default keyboard shortcut is Ctrl + Alt + K. To set a different one, place your cursor in the field and press the desired key combination on your keyboard. Take care not to use a combination that already has another function assigned to it.
Format of Antidote menus in other software
Context menu and Menu layout
Access the context menu in a software application by right-clicking it. Antidote integrates with this menu according to your defined settings, allowing you to quickly access frequently used tools.
The Main menu list to the left, under Menu layout, determines the items included in the first level of the context menu, while the two lists to the right show the submenus for the dictionaries and language guides. Drag and drop list items to move them between levels or change their order of appearance.
Once your selection is complete, click the Preview menu above the lists to view the context menu that you have created.
Combine all in a general “Antidote” menu
Turn the toggle on to display a single “Antidote” item in the first level of the context menu. The resources will then appear as submenus.
Include a submenu under “Dictionaries” and Include a submenu under “Guides”
These two toggles manage how the resources submenu is displayed, as presented in the lists shown above.